PAPI Account Watcher
Introduction
This tutorial demonstrates how to build a simple command-line interface (CLI) application that monitors a user's account on the relay chain for the system.remarkWithEvent extrinsic, using the Polkadot API.
The system.remarkWithEvent extrinsic enables the submission of arbitrary data on-chain. In this tutorial, the data consists of a hash derived from the combination of an account address and the word "email" (address+email). This hash is monitored on-chain, and the application listens for remarks addressed to the specified account. The system.remarkWithEvent extrinsic emits an event that can be observed using the Polkadot API (PAPI).
When the application detects a remark addressed to the specified account, it plays the "You've Got Mail!" sound byte.
Prerequisites
Before starting, ensure the following tools and dependencies are installed:
- Node.js (version 18 or higher).
- A package manager (npm or yarn).
- Polkadot.js browser extension (wallet).
- An account with Westend tokens.
Clone the Repository
To follow this tutorial, you can either run the example directly or use a boilerplate/template. This tutorial uses a template that includes all necessary dependencies for working with the Polkadot API and TypeScript. Clone the polkadot-api-example-cli project and checkout to the empty-cli as follows:
git clone https://github.com/polkadot-developers/dapp-examples/tree/v0.0.2
cd polkadot-api-example-cli
git checkout empty-cli
After cloning, install the required dependencies by running:
Explore the Template (Light Clients)
After opening the repository, you will find the following code (excluding imports):
async function withLightClient(): Promise<PolkadotClient> {
  // Start the light client
  const smoldot = start();
  // The Westend Relay Chain
  const relayChain = await smoldot.addChain({ chainSpec: westEndChainSpec });
  return createClient(getSmProvider(relayChain));
}

async function main() {
  // CLI code goes here...
}

main();
The withLightClient function is particularly important. It uses the built-in light client functionality, powered by smoldot, to create a light client that synchronizes and interacts with Polkadot directly within the application.
Create the CLI
The CLI functionality is implemented within the main function. The CLI includes an option (-a / --account) to specify the account to monitor for remarks:
const program = new Command();
console.log(chalk.white.dim(figlet.textSync('Web3 Mail Watcher')));
program
  .version('0.0.1')
  .description(
    'Web3 Mail Watcher - A simple CLI tool to watch for remarks on the Polkadot network'
  )
  .option('-a, --account <account>', 'Account to watch')
  .parse(process.argv);

// CLI arguments from commander
const options = program.opts();
Watch for Remarks
The application monitors the Westend network for remarks sent to the specified account. The following code, placed within the main function, implements this functionality:
if (options.account) {
  console.log(
    chalk.black.bgRed('Watching account:'),
    chalk.bold.whiteBright(options.account)
  );
  // Create a light client to connect to the Polkadot (Westend) network
  const lightClient = await withLightClient();
  // Get the typed API to interact with the network
  const dotApi = lightClient.getTypedApi(wnd);
  // Subscribe to the System.Remarked event and watch for remarks from the account
  dotApi.event.System.Remarked.watch().subscribe((event) => {
    const { sender, hash } = event.payload;
    const calculatedHash = bytesToHex(
      blake2b(`${options.account}+email`, { dkLen: 32 })
    );
    if (`0x${calculatedHash}` === hash.asHex()) {
      sound.play('youve-got-mail-sound.mp3');
      console.log(chalk.black.bgRed('You got mail!'));
      console.log(
        chalk.black.bgCyan('From:'),
        chalk.bold.whiteBright(sender.toString())
      );
      console.log(
        chalk.black.bgBlue('Hash:'),
        chalk.bold.whiteBright(hash.asHex())
      );
    }
  });
} else {
  console.error('Account is required');
  return;
}
Compile and Run
Compile and execute the application using the following command:
For example:
The output should look like this:
Test the CLI
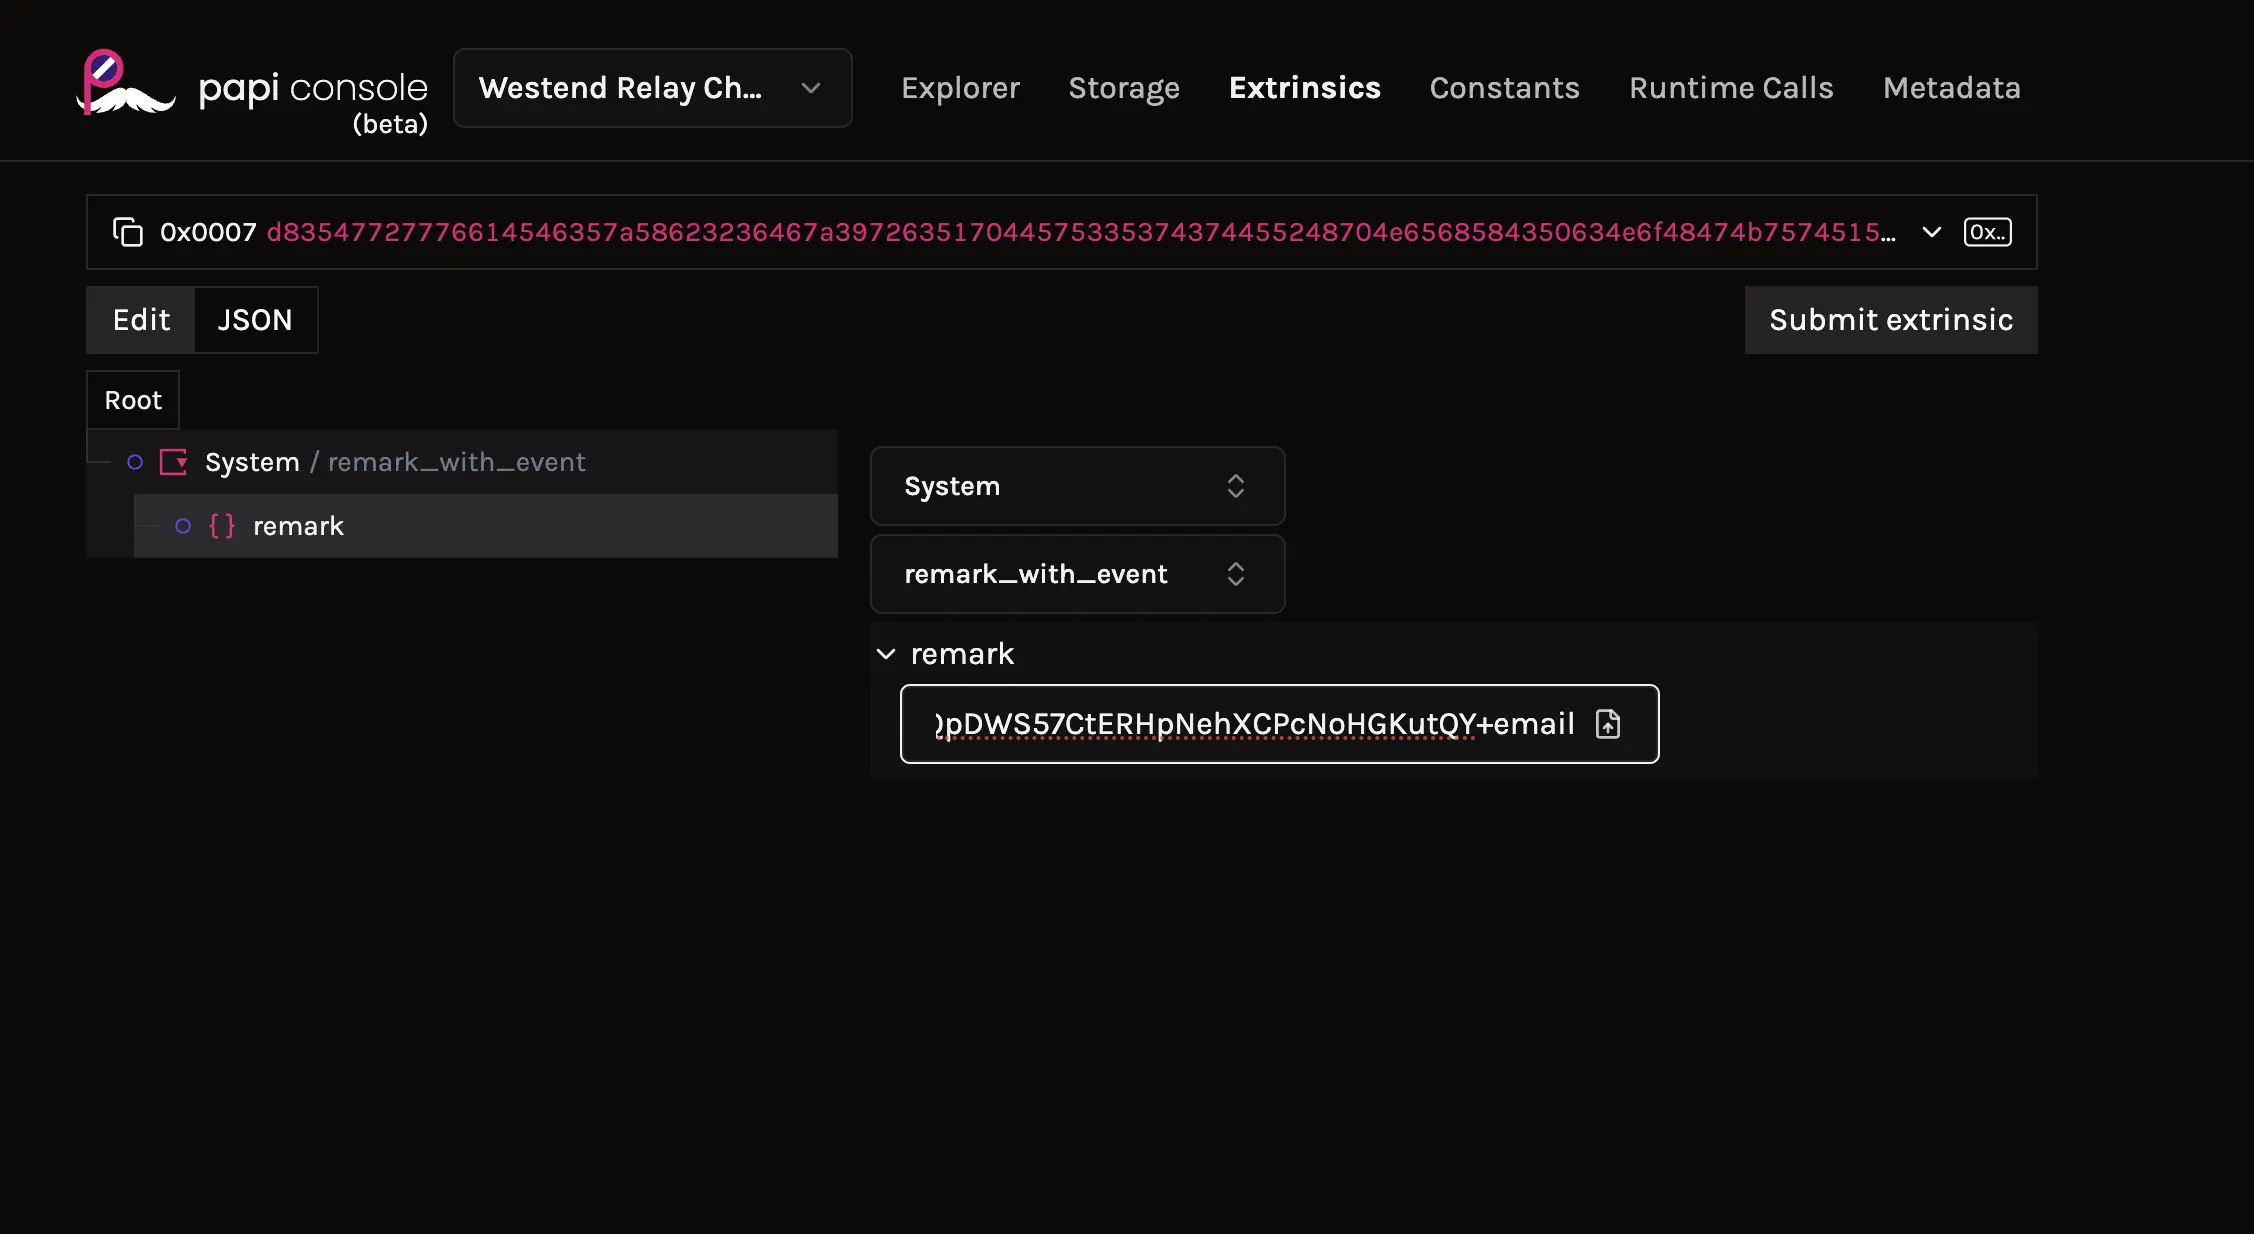
To test the application, navigate to the Extrinsics page of the PAPI Dev Console. Select the System pallet and the remark_with_event call. Ensure the input field follows the convention address+email. For example, if monitoring 5GrwvaEF5zXb26Fz9rcQpDWS57CtERHpNehXCPcNoHGKutQY, the input should be:
Submit the extrinsic and sign it using the Polkadot.js browser wallet. The CLI will display the following output and play the "You've Got Mail!" sound:
Next Steps
This application demonstrates how the Polkadot API can be used to build decentralized applications. While this is not a production-grade application, it introduces several key features for developing with the Polkadot API.
To explore more, refer to the official PAPI documentation.
| Created: May 28, 2025
